
Getting Started in the Inbox
Getting Started in the Inbox
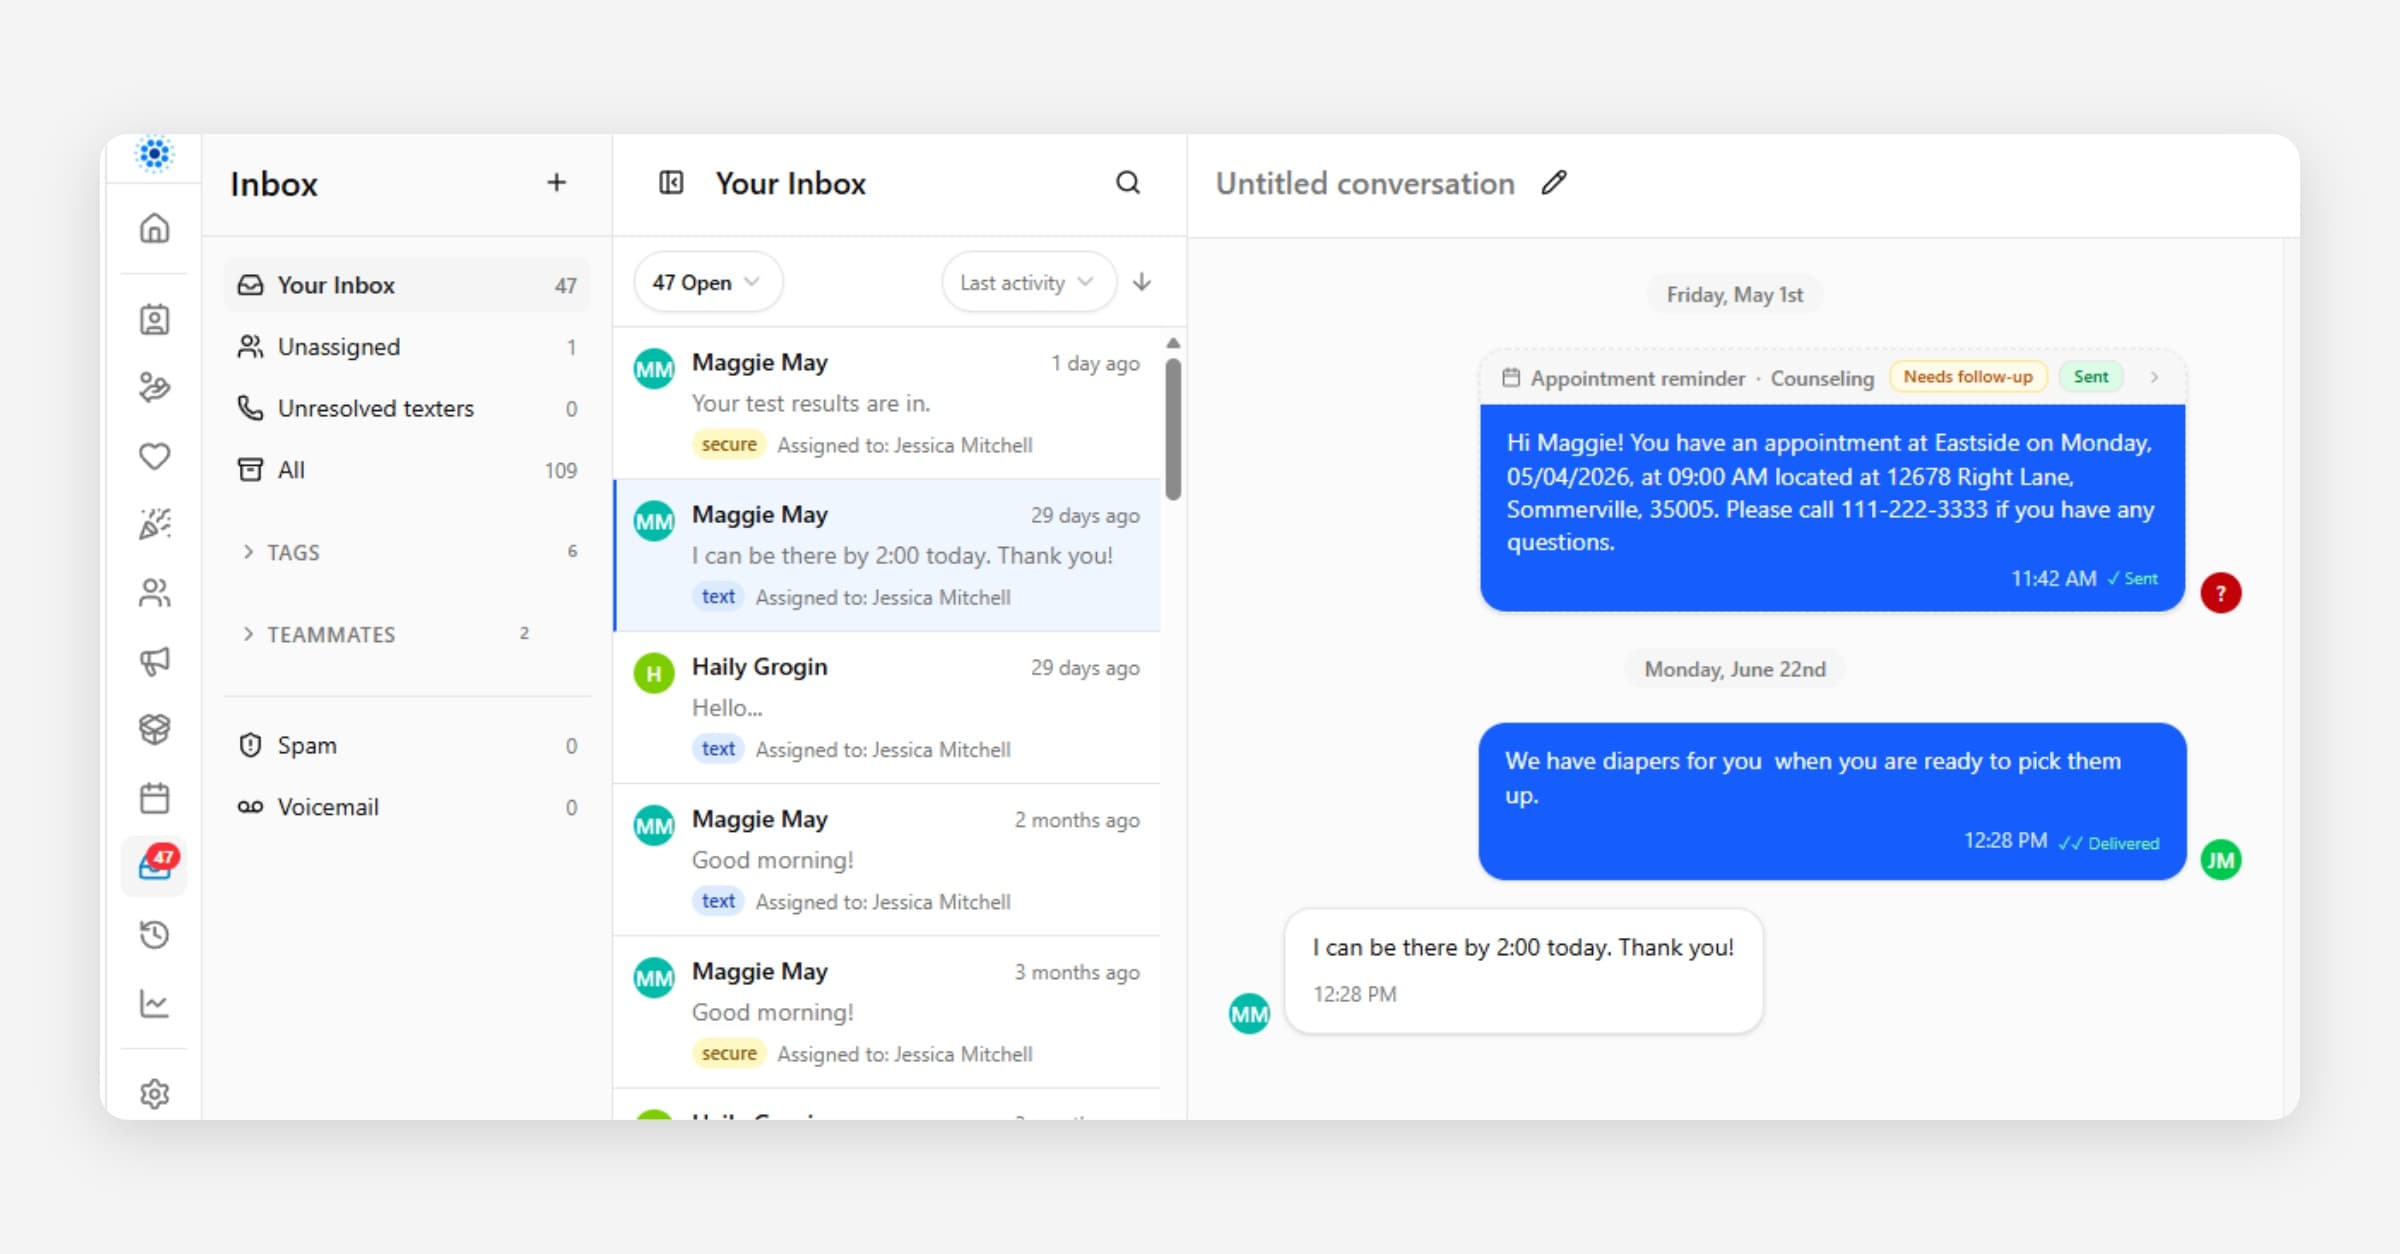
This is your first-day guide to the Inbox. Follow the steps below and you will be reading, answering, and handing off conversations in a few minutes. For the bigger picture of what the Inbox is, see Inbox Overview.
Before you start
Your team needs a connected text number before anyone can send or receive text messages. If you can already see conversations in your Inbox, you are all set. If the Inbox is empty or replies will not send, an administrator may still need to finish connecting your text number.
Step 1 — Open the Inbox
Open Inbox from the main navigation (or press g then i anywhere in CoolFocus). You will see a list of conversations on one side and the selected conversation on the other. After your first visit, Inbox reopens to the mailbox, filters, and sort order you last used, so this may not always be the Your Inbox view.
Step 2 — Pick a mailbox view
Use the mailbox views to decide what you are looking at:
• Your Inbox — conversations assigned to you. Start here each day. Shortcut: G then M.
• Unassigned — conversations that still need an owner. Shortcut: G then U.
• All — every conversation you have permission to see. Shortcut: G then A.
• Closed — finished conversations, kept for history. Conversations will automatically reopen if a client responds again, or you can click the Reopen button.
Step 3 — Open and read a conversation
Click a conversation to open it. Read the most recent message first, then scroll up if you need earlier context. Each conversation is tied to a person, so you can see who you are talking to. Once a conversation is open, press J or K to move to the next or previous conversation in the list without going back to the list first.
Step 4 — Reply, or add an internal note
There are two different ways to write in a conversation:
• A reply is sent to the contact. Press R to jump straight to the reply box.
• An internal note is for your team only. The contact never sees it. Use notes for context, decisions, or handoff details.
Before sending a reply, check which channel (Text or Secure) it will use. Do not put private or sensitive information (medical details, financial details) in a regular text or email — use a secured message instead. See Inbox Overview for the difference between secured and regular messages. You can also press N from anywhere in the Inbox to start a new secure message.
Step 5 — Assign the conversation
Assign the conversation to whoever owns the next reply or follow-up — that might be you. Clear ownership is the single most important habit in the Inbox: It is how the team knows nothing is being missed.
Step 6 — Add follow-up when needed
If something needs to happen later, add a task. You can also log a call or add an attachment so the whole history stays in one place instead of scattered across email and sticky notes.
Step 7 — Close when you are done
Close the conversation when the question is answered or the work is complete. Closed conversations stay searchable for history and reporting. If follow-up is still needed later, create a task instead of leaving the conversation open forever.
Step 8 — Turn on your notifications
So you don't have to keep checking the Inbox, set up notifications for the messages that matter to you — a new message, an unassigned message, or a conversation assigned to you. You can get these in-app (the bell), by text, or by email. Set your notifications once from your profile menu → Your notifications (avatar in the sidebar), or follow Choosing What You're Notified About for the recommended setup. These settings are personal to you — each teammate manages their own notification preferences. New accounts start with most notifications off, so this step is worth doing on day one.
Tip: work the Inbox by keyboard
Once you're comfortable with the basics above, the Inbox has a full set of keyboard shortcuts (mailbox navigation, next/previous conversation, reply, and new secure message) so you can move through conversations without a mouse. Press Cmd+/ or Ctrl+/ anytime to see the shortcuts available on your current screen. See Keyboard Shortcuts and the Command Menu for the full list.
Once you are comfortable with the basics, try navigating the Inbox without a mouse: press j or k to move between conversations in the list, n to start a secure message, and r to jump to the reply box. Press Cmd+/ or Ctrl+/ at any time to see the full list of shortcuts for your current screen.
Where to go next
• Managing Conversations — the full working routine.
• Notes & Tasks in Conversations — how tasks keep conversations from slipping.
• Sending Text Messages — what makes a good outbound text.
• Understanding Text Message Delivery Warnings — what to do when a text will not send.
• Choosing What You're Notified About — get alerted without watching the Inbox.
• Inbox Best Practices — habits that keep the team running smoothly.
Was this helpful?