
Website Chat Widget
Add an embeddable chat bubble to your website. Visitor chats open in the Inbox for CoolFocus Premium subscriptions.
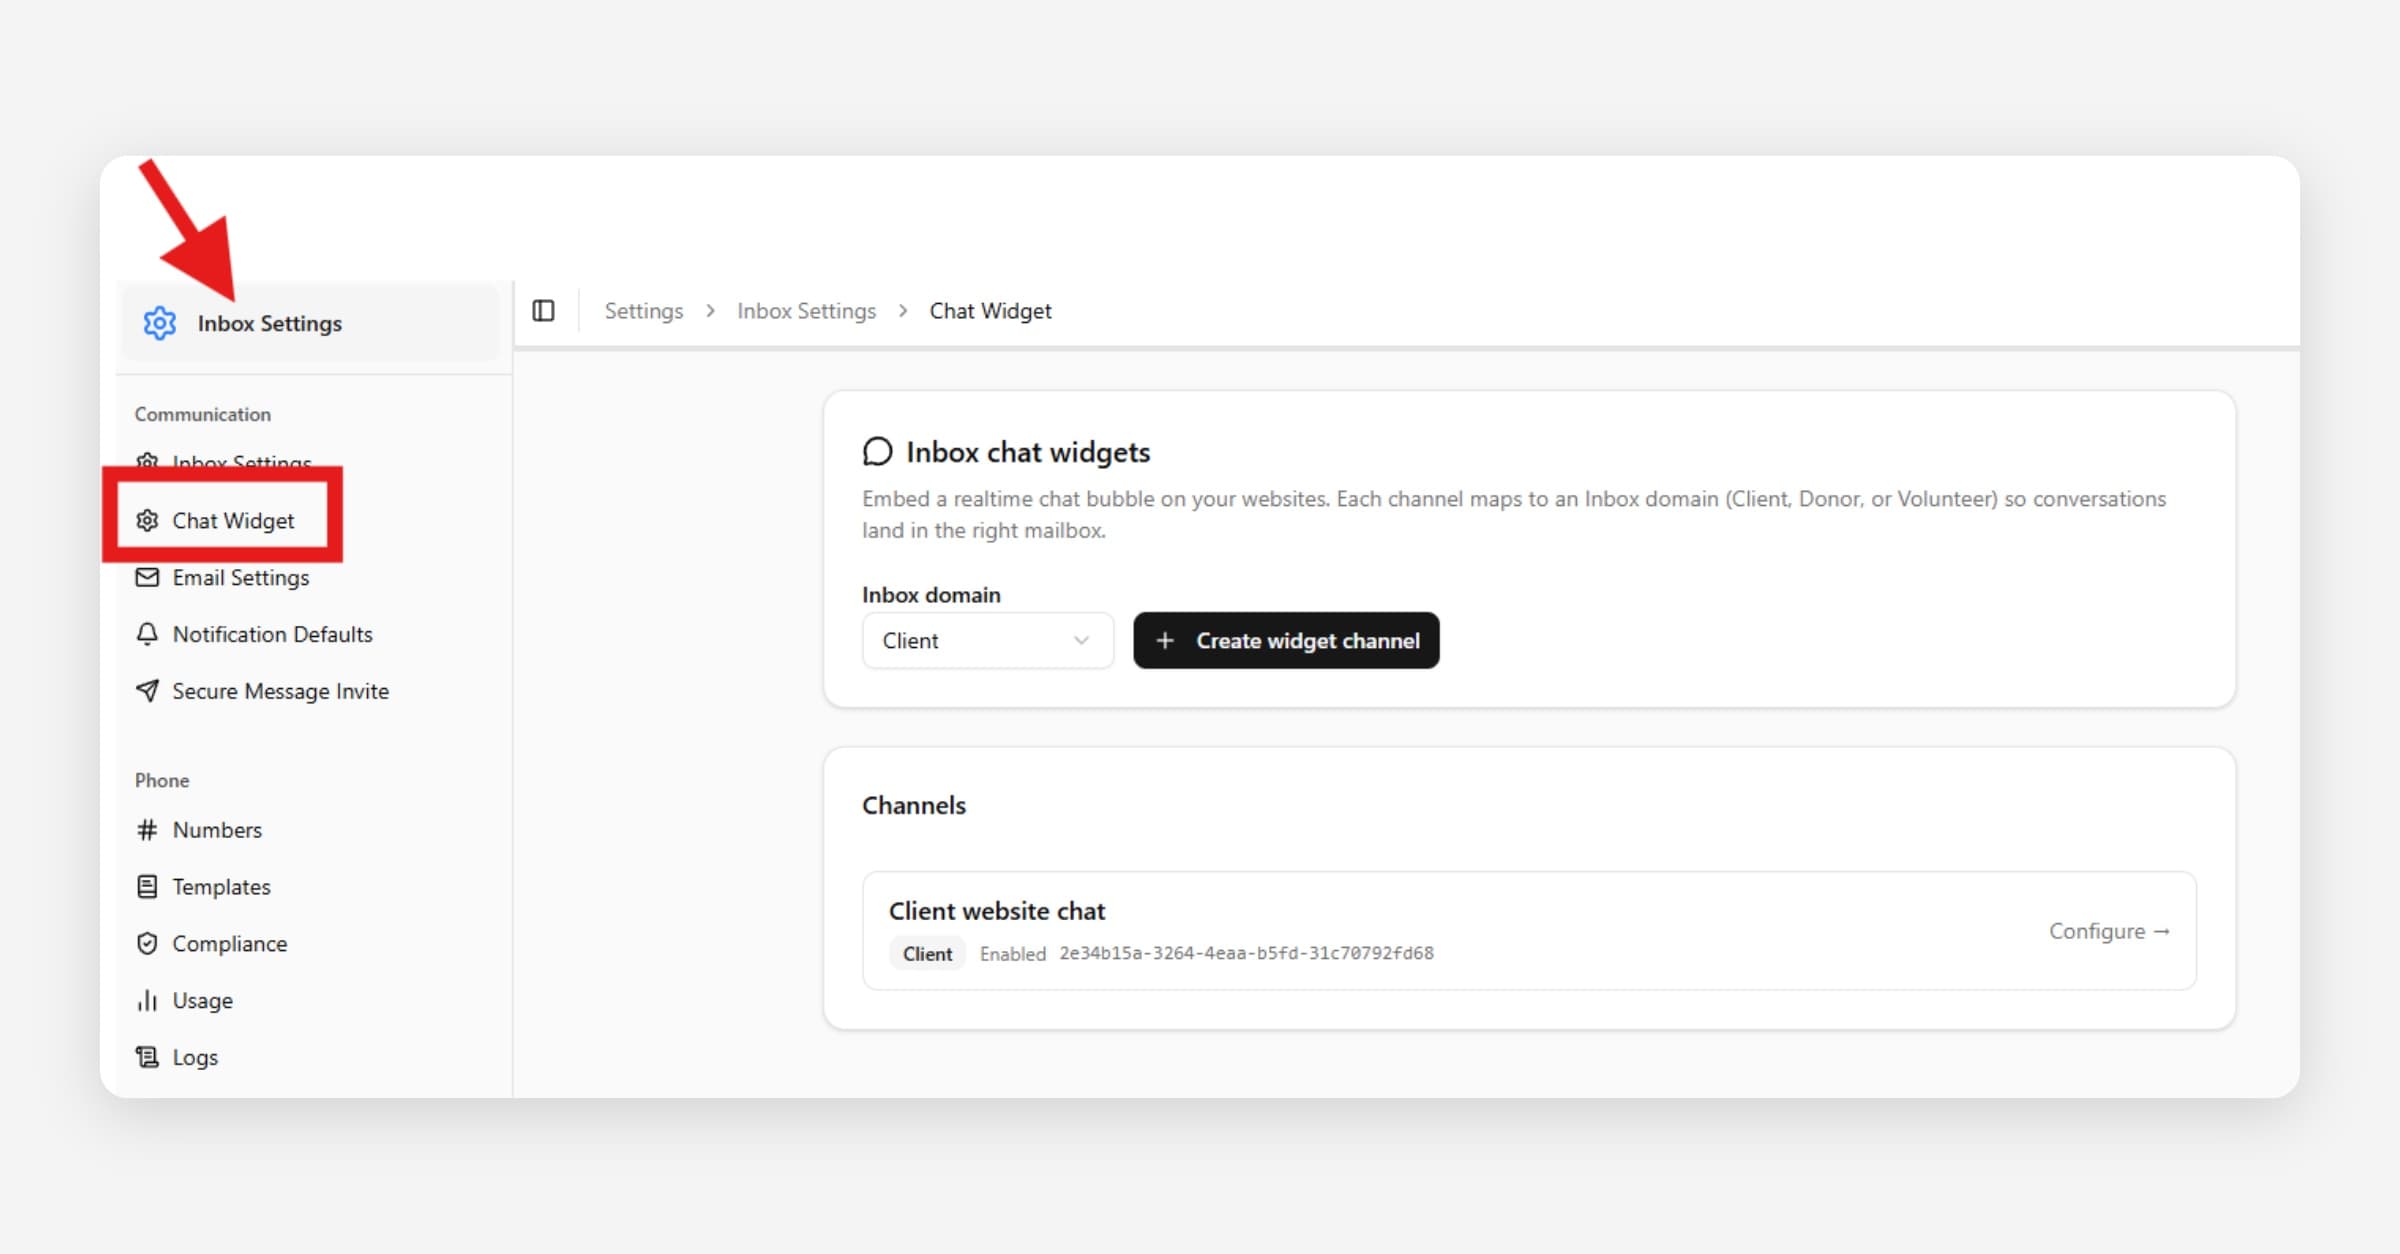
The Website Chat Widget puts a chat bubble on your center’s website. When someone starts a chat, the conversation opens in CoolFocus Inbox next to your texts and secured messages—so your team answers website visitors in the same place they already work.
Package note: Website Chat Widget is included on the Premium subscription. Core and Plus do not include it. If you do not see Chat Widget in Settings, check Settings → Plan & Billing, or ask CoolFocus support about upgrading.
Texting fee: Website chat widget messages (incoming and outgoing) will add a text messaging usage fee on your monthly CoolFocus invoice when CoolFocus sends or receives an actual text message. Turning a setting on alone does not bill you, but each message that goes out or comes in can. Full list: What Counts as a Text Message & What are the Text Usage Fees?.
What it is
• A small chat button visitors see on your website
• Conversations that land in CoolFocus Inbox (not a separate chat tool)
• Separate channels for Client, Donor, or Volunteer audiences, so chats go to the matching Inbox domain
• Branding you control (greeting, colors, button text, and position)
This is different from the Client Portal booking widget (online appointments) and from Olive / Chloe third-party chat integrations.
Before you start
• Your organization needs the Inbox module turned on
• You need the Premium plan for Website Chat Widget
• Someone with permission to edit Settings should set this up
• Your website person (or hosting provider) will need to paste a short install snippet into your site’s HTML
Open Chat Widget settings
1. Go to Settings
2. Open Chat Widget (listed with your Inbox / communication settings)
3. You will see your widget channels, or an empty list if you have not created one yet
Create a widget channel
1. Choose the Inbox domain for this bubble:
• Client — website visitors who may become clients
• Donor — giving / donor website traffic
• Volunteer — volunteer interest or staff-recruiting pages
2. Select Create widget channel
3. Open the new channel to configure it
You can create more than one channel (for example, one Client bubble on your main site and one Donor bubble on a giving page).
Configure branding and behavior
On the channel page, set:
• Name — internal label so your team knows which site this is for
• Inbox domain — Client, Donor, or Volunteer (where conversations appear)
• Header greeting — what visitors see when they open the chat
• Start conversation button — the button label inside the chat
• Accent color — matches your brand
• Enabled — turn this on when you are ready for the public; a disabled widget does not accept website chats
• Launcher position — left or right side on desktop/tablet (mobile stays bottom-right)
• Optional team introduction, reply expectations, and special notice text
• Optional allowed origins — limit which website addresses may load this widget (comma-separated). Leave blank only if you understand the risk of the snippet being reused on other sites
• Optional rate limits for new chats and messages (spam protection)
Select Save after you change settings.
Preview before you go live
Use the Preview on the channel page to open and close the bubble and try a test chat after the channel is Enabled and saved.
Tip: If the preview is hard to see, make sure the channel is enabled and saved. Move the launcher position if another support bubble on the page covers it.
Install the widget on your website
1. On the channel page, find Install snippet
2. Copy the snippet (it includes your unique widget key)
3. Paste it into your website HTML just before the closing </body> tag (or use your site builder’s “custom code / footer scripts” area)
4. Publish your website and open the live page in a private/incognito window to confirm the bubble appears
Use the exact snippet CoolFocus shows for that channel. Do not reuse one site’s widget key on a different audience without creating a separate channel.
Answer chats in Inbox
1. Open Inbox
2. Website chats appear as conversations (type widget)
3. Assign, reply, add notes, and close them the same way you handle other Inbox conversations
4. Visitors poll for your replies in the bubble (they do not need a CoolFocus login for basic chat)
New website chats create a contact in the matching domain (client, donor, or volunteer) so the conversation stays linked to a person record.
Good practices
• Use a Client domain bubble on client-facing pages; do not mix donor-only pages onto a Client channel if you want clean mailboxes
• Keep medical details and private results out of casual website chat when a secured message or portal share is safer — see When to Use a Regular Text vs. a Secured Message
• Turn Enabled off if you need to pause the bubble without removing the code from your site
• If spam appears, lower the channel rate limits, tighten allowed origins, and use existing Inbox spam tools
Troubleshooting
• No Chat Widget in Settings — confirm Inbox is on and you are on Premium; ask an org admin to check Plan & Billing
• Bubble missing on the live site — confirm the snippet is published, the channel is Enabled, and you are testing the correct page URL
• Chats not showing in Inbox — confirm the channel’s Inbox domain and that your user can view that domain’s mailbox
• Preview blank — enable the channel, save, and try again; check that another on-page bubble is not covering it
Related
• What Counts as a Text Message & What are the Text Usage Fees?
• Getting Started in the Inbox
• Inbox Overview
• Inbox Domains: Client, Donor, and Volunteer
• Managing Conversations & Sending Messages in Inbox
• When to Use a Regular Text vs. a Secured Message
• Inbox Settings
Was this helpful?