
Getting Started with CoolFocus
A quick map of the main CoolFocus areas and where to begin.
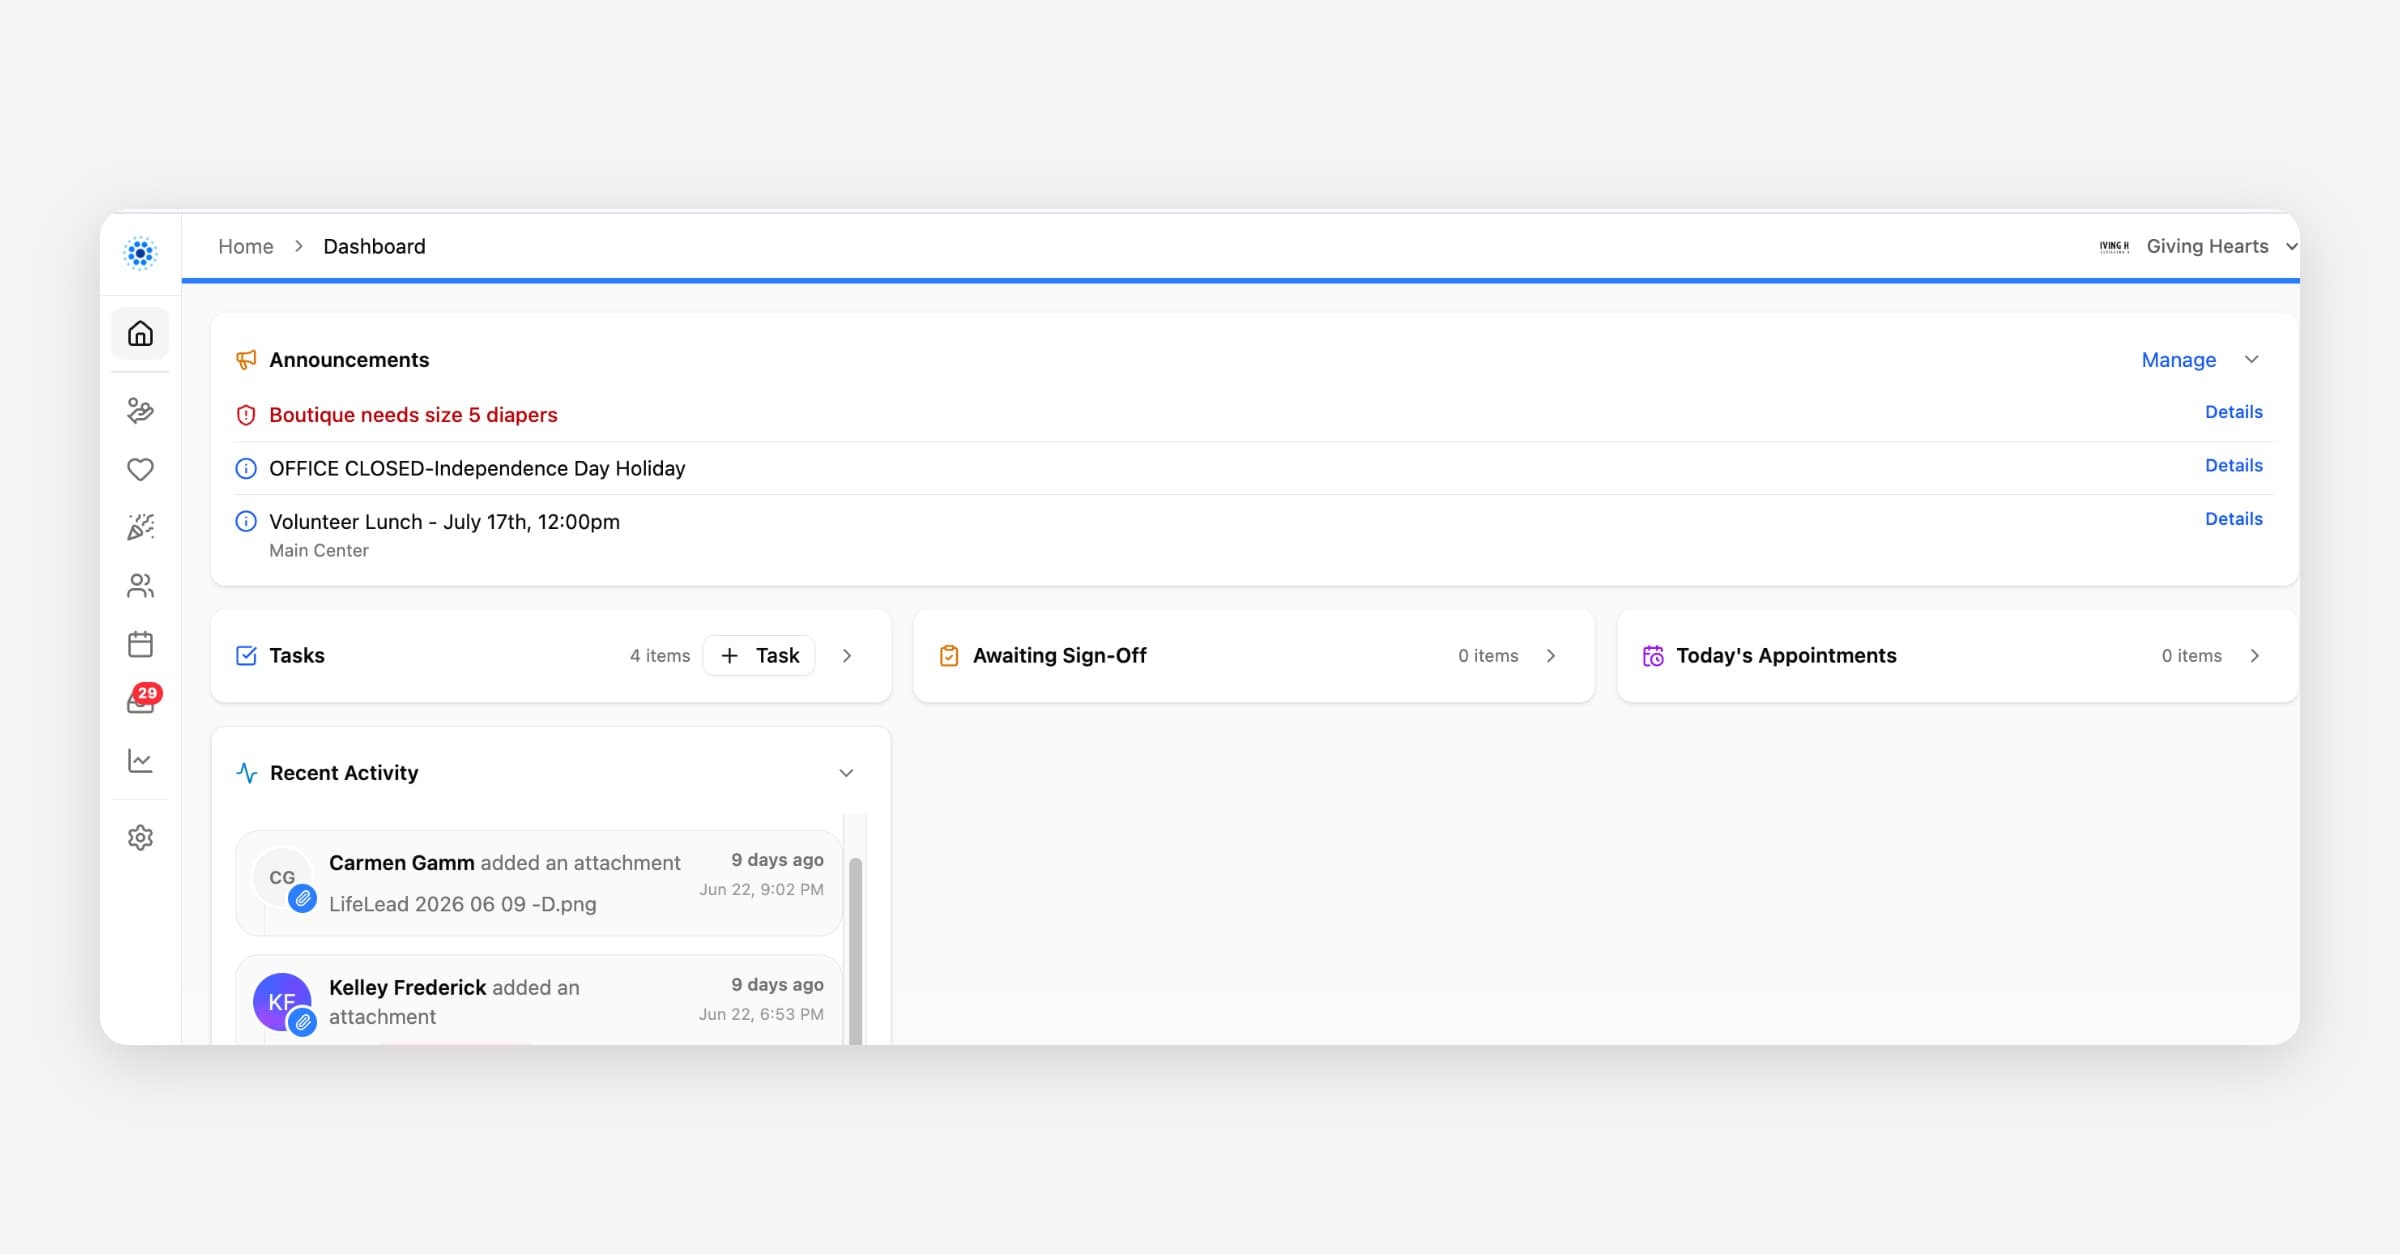
CoolFocus brings your organization's people, communication, care work, giving, events, and reporting into one system. The areas you see depend on what your organization uses and the permissions according to your User Group.
Your first steps
1. Logging In & Finding Your Way Around - sign in and learn the layout.
2. As an Administrator, access Settings to set your general Organizational Settings, as well as the Settings for all the modules your organization will use, such as Giving, Client Care (forms and documents, client portal), Scheduler Settings (what affects the scheduling of your client appointments), Security Settings for Users and User Groups (what your team members have access to), and third-party Integrations.
3. Inviting Your Team - bring your staff into CoolFocus (only administrators have the ability to invite additional team members or users).
4. New to the words we use? Keep the CoolFocus Glossary handy.
Users, User Groups, and Invitations
Getting your team into CoolFocus is an administrator task. Three settings work together: Users, User Groups, and Invitations. All three live under Settings -> Security.
Users
A user is a staff or team member who can sign in to CoolFocus. That is different from a client, donor, volunteer, or contact record, adding someone as a contact does not give them a login.
On Settings -> Security -> Users you can:
• See who already has access
• Open a person's user profile
• Check which user group they belong to
• Turn Administrator on or off
• Link the login to their People record (Linked Person) so Home and schedule views show the right appointments
• Remove access when someone leaves
Someone only appears on the Users list after they accept their invitation and finish setting up sign-in. Until then, look under Invitations, not Users.
Full detail: Users
User Groups
A user group is a group of people who all have the same access, for example finance staff, client services, or event volunteers. Groups control:
• Which modules are accessible from the sidebar (Give, Care, Scheduler, and so on)
• Whether someone can view, add, edit, or delete on those pages
• Access to sensitive tools and settings for non-administrators
Administrators can open every module your organization is licensed for. Everyone else gets sidebar access from their user group.
Set groups up under Settings -> Security -> User Groups before you invite a large team, so each invite can land in the right group.
Full detail: User Groups: What Staff Can Open and Change
Need to limit which individual records someone can see (for example only their own clients, or one campus)? That is a separate Premium feature, Data Access Rules: Limit Which Records Staff Can See.
How invitations work
Use Invitations when someone needs a CoolFocus login for the first time.
1. Decide which user group they should join (and whether they should be an administrator).
2. Go to Settings -> Security -> Invitations (or follow Inviting Your Team).
3. Send the invite by email, CoolFocus needs an email address to create the invite.
4. The person gets an email with a link to finish setting up their own sign-in.
5. After they accept, they show up on Users and can sign in with the access of their group.
If the email does not arrive, have them check spam or junk, then check the invitation status on the Invitations page. You can resend or cancel pending invites from there.
Full detail: Invitations
A sensible order for admins
1. Invite a small first group (yourself and a couple of key staff).
2. Build user groups that match real jobs in your organization.
3. Invite the rest of the team into the right groups.
4. On each accepted user, link to a Person record (Staff or Volunteer) if they need the Home screen or My Schedule views tied to their People record.
Main areas (depending on your access permissions)
• Home: An overview of what is happening in your organization today. Includes interoffice announcements, tasks assigned to you, any charts awaiting sign-off, today's appointments assigned to you, and a recent activity feed showing what your team members have been doing. The recent activity feed only appears for administrators, non-administrators do not see it on their Home screen, and there is no setting to turn it off.
• Giving: manage donors, contributions, funds, recurring gifts, pledges, in-kind gifts, and fundraising efforts.
• CoolPay: manage online giving setup, donation forms, payment transactions, and payout reconciliation.
• Care: find and maintain client records, contact information, notes, tasks, and related history.
• Case Management: coordinate ongoing care, follow-up, goals, tasks, and history across multiple interactions.
• Visits: document the details of a specific appointment, service, class, test, ultrasound, or client encounter.
• Forms and Consents: fillable forms to retrieve client information, or consent documents that the client needs to accept or decline. These can be built according to your needs and sent electronically to the client.
• Charting: collects detailed visit information regarding the client.
• Scans to Review: the queue of ultrasound and other charts waiting for physician review and sign-off.
• Points & Inventory: manage the shop catalog, on-hand stock, and client checkouts that use points (or vouchers).
• Events: plan fundraising events, sponsorships, registrations, tables, seating, tickets, and event follow-up.
• Serve: manage contact information for your volunteers, record their service hours, and track their onboarding status or required documentation.
• Scheduler: configure client appointment types, locations, resources, and online booking rules. Plus and Premium subscription levels include an online booking widget, booking links for third-party scheduler integrations, and the ability to send appointment reminder text messages.
• Inbox & Client Portal: manage client conversations, texts, replies, assignments, and follow-up. The Secure texting option is for messages that include Private Health Information (PHI) to send the client a secured login to the client portal. The regular Text option is for general conversations that do not include PHI.
• Reports: review saved reports and analytics views across your data.
• Data Grid: the table view of any record type, where you can sort, filter, group, search, and choose which columns to show so the list fits the way you work.
• Segments: saved filters that group records by conditions you define (for example, active clients or lapsed donors), so you can reopen a focused list without rebuilding the filters each time.
• Love INC Community Assistance: track Love INC-style liaison assistance work such as requests, needs met, referrals, vouchers, gap ministries, and verifications. This model is based on national Love In The Name of Christ organizational standards.
• Contacts & Organizations: keep shared relationship records for people, households, churches, and organizations (follows the national Love INC model mentioned above for those affiliates).
• Settings (Admins only): access your overall organizational settings, update your CoolFocus billing information, access settings options for all modules you have access to, and view delete history.
When records overlap
Some records may appear in more than one context. For example, a person may be involved with your organization as a client, donor, volunteer, household member, or community-assistance neighbor. Start with the area that matches the work you are doing today, then you can easily switch to that person's record in another involvement as needed.
Getting help
A Support launcher is available at the bottom right corner of every page in CoolFocus. Click it to open the support widget, where you can ask questions, report issues, or share feedback.
For some issues, a support agent may send you a screen recording link instead of asking you to describe the problem in writing. See Screen Recording Links from CoolFocus Support for what those links do and what to expect.
Was this helpful?